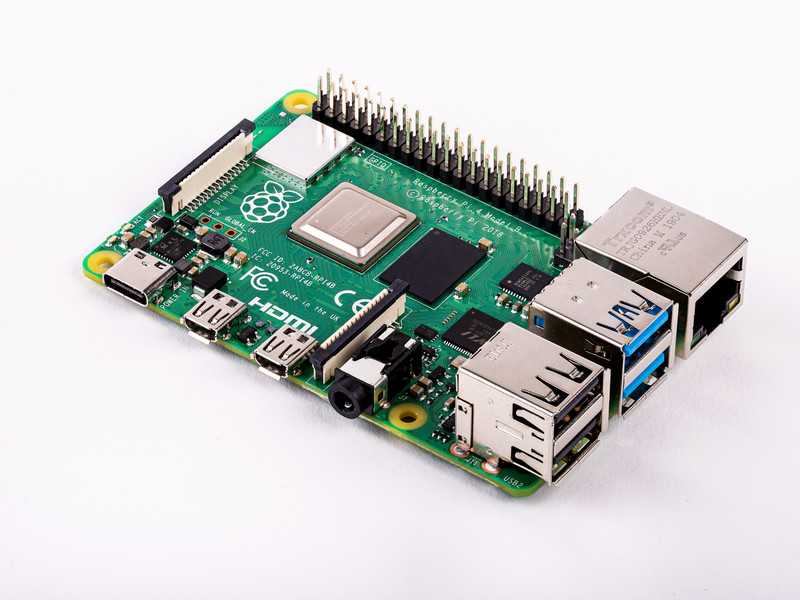
随着树莓派版本不断升级,现在硬件性能已经远超于大多数路由器,所以 使用树莓派实现路由器功能 也是一个不错的方案。我测试的结果效果不是非常明显,看视频感觉可以使用更清晰度,但延迟不是非稳定。我认为树莓派没有天线导致信号不是很好。前面版本的树莓派都有为天线预留了焊盘,目前还没有找到树莓派4的天线焊盘位置。
2019.09.01更新:增加桥接方式,使用USB网卡后信号得到了有效改善。
2020.04.26更新:增加 softnet 配置优化
1 路由方式热点
使用路由方式与交换机方式的主要区别是:所连设备的ip分配由树莓派负责还是树莓派的上级设备负责。在我试验过程中,交换机模式优于路由方式。
1.1 安装软件
$ sudo apt-get install dnsmasq hostapdhostapd可以将无线网卡变为无线接入点,dnsmasq是作为DHCP服务器和DNS服务器。udhcpd 也是一个常用的DHCP服务器软件,配置可以参照 RPI-Wireless-Hotspot。
1.2 配置网卡
配置方面我基本参照将树莓派打造成超级无线路由器,然后进行局部的修改。编辑/etc/network/interfaces。
auto eth0
allow-hotplug eth0
iface eth0 inet dhcp

allow-hotplug wlan0
iface wlan0 inet static
    address 192.168.1.1
    netmask 255.255.255.0
    network 192.168.1.0
    broadcast 192.168.1.255

up iptables-restore < /etc/iptables.ipv4.nat
查阅了很多资料都没有配置eth0(有线网卡)。我的测试结果是不配置eth0,则不启用eth0,所以我添加了配置文件的第一块,将eth0配置为自动连接。
第二部分是将wlan0(无线网卡)配置为固定ip。其中需要注意的是不要让ip出现冲突。例如tplink使用ip地址段也是192.168.1.***,所以如果树莓派的上一级是tplink,那么则需要修改配置文件中的地址。
第三部分是调用iptables的配置文件,这个会在后面介绍。
1.3 配置hostapd
编辑/etc/hostapd/hostapd.conf
# This is the name of the WiFi interface we configured above
interface=wlan0

# Use the nl80211 driver with the brcmfmac driver
driver=nl80211

# This is the name of the network
ssid=RASP

# Use the 2.4GHz band
hw_mode=g

# Use channel 6
channel=6

# Enable 802.11n
ieee80211n=1

# Enable WMM
wmm_enabled=1

# Enable 40MHz channels with 20ns guard interval
ht_capab=[HT40][SHORT-GI-20][DSSS_CCK-40]

# Accept all MAC addresses
macaddr_acl=0

# Use WPA authentication
auth_algs=1

# Require clients to know the network name
ignore_broadcast_ssid=0

# Use WPA2
wpa=2

# Use a pre-shared key
wpa_key_mgmt=WPA-PSK

# The network passphrase
wpa_passphrase=beekctop

# Use AES, instead of TKIP
rsn_pairwise=CCMP这样就配置成了一个名为RASP,密码为beekctop的热点。使用sudo systemctl enable hostapd就可以搜索到WiFi热点了,但这时还无法连接。
1.4 配置dnsmasq
编辑dnsmasq配置文件/etc/dnsmasq.conf
# Use interface wlan0
interface=wlan0

# Explicitly specify the address to listen on
listen-address=192.168.1.1

# Bind to the interface to make sure we aren't sending things elsewhere
bind-interfaces

# Forward DNS requests to Google DNS
server=114.114.114.114

# Don't forward short names
domain-needed

# Never forward addresses in the non-routed address spaces
bogus-priv

# Assign IP addresses between 192.168.1.50 and 192.168.1.150 with a 12 hour lease time
dhcp-range=192.168.1.50,192.168.1.150,12h
最后 dhcp-range 项的地址要与 2 配置网卡 中无线网卡的地址相配合。
1.5 配置iptables
最后需要配置的是iptables,它的任务是负责eth0和wlan0间的转发。
$ sudo iptables -t nat -A POSTROUTING -o eth0 -j MASQUERADE
$ sudo iptables -A FORWARD -i eth0 -o wlan0 -m state --state RELATED,ESTABLISHED -j ACCEPT
$ sudo iptables -A FORWARD -i wlan0 -o eth0 -j ACCEPTiptables的配置每次重启都会重置。这里将配置保存到文件中,然后每次启动后读取,恢复配置(见2 配置网卡 最后)。
$ sudo sh -c "iptables-save > /etc/iptables.ipv4.nat"1.6 配置开机自启动
使用 systemctl 工具配置 dnsmasq 和 hostapd 开机自启动。将其中的 enable 替换为 start 和 status ,可以实现立即启动软件和查看软件当前状态。
$ sudo systemctl enable dnsmasq
$ sudo systemctl enable hostapd
我在配置时出现错误信息 Failed to start hostapd.service: Unit hostapd.service is masked. 使用下面命令可以解决。
$ sudo systemctl unmask hostapd2 交换机方式热点
本章将使用树莓派板载wifi共享一个2.4g热点,USB网卡共享一个5g热点。我的USB网卡是rtl8812au不是一个免驱设备,需要先安装驱动。
2.1 安装rtl8812au驱动
rtl8812au官方提供了linux驱动,但是版本太老了无法使用。github上有几个版本的驱动。最开始选择的是gnab的驱动,但是hostapd一直报错,换成abperiasamy的驱动就好了。
首先安装驱动依赖的相关软件
$ sudo apt-get install linux-image-rpi-rpfv linux-headers-rpi-rpfv raspberrypi-kernel-headers dkms build-essential bc修改文件/boot/config.txt,在文件最后添加一下内容,之后重启树莓派。
kernel=vmlinuz-3.10-3-rpi
initramfs initrd.img-3.10-3-rpi followkernel
下载驱动项目并移动到项目文件夹中
$ git clone https://github.com/abperiasamy/rtl8812AU_8821AU_linux.git
$ cd rtl8812AU_8821AU_linux
编辑文件Makefile文件,修改其中的CONFIG_PLATFORM_ARM_RPI、 CONFIG_PLATFORM_I386_PC项
CONFIG_PLATFORM_I386_PC = n
CONFIG_PLATFORM_ARM_RPI = y
最后完成编译和驱动的安装
$ make
$ sudo make install
$ sudo modprobe -a rtl8812au
2.2 安装网桥工具与配置
安装网桥相关工具
$ sudo apt-get install udhcpd bridge-utils hostapd编辑/etc/network/interfaces。前面lo、eth0两部分是有线网卡本身的配置,添加的是最后一部分br0网桥部分。本章使用了两个无线网卡,分别共享2.4G和5G信号,所以bridge_ports中桥接了三个网卡。
auto lo

auto eth0
iface eth0 inet manual

auto br0
iface br0 inet dhcp
bridge_ports eth0 wlan0 wlan1我开始将eth0配置成dhcp,结果下游设备可以联网,树莓派无法联网。可能是配置成dhcp会导致软件冲突。
2.3 编辑hostapd
如上节所说,本章使用了两个网卡,所以分别建立两个配置文件,分别对应两个热点。
建立文件/etc/hostapd/beekc.conf
interface=wlan0
driver=nl80211
ssid=BEEKC_PI
bridge=br0
hw_mode=g
channel=1
ieee80211n=1
wmm_enabled=1
ht_capab=[HT40][SHORT-GI-20][DSSS_CCK-40]
macaddr_acl=0
auth_algs=1
ignore_broadcast_ssid=0
wpa=2
wpa_key_mgmt=WPA-PSK
wpa_passphrase=passwd
rsn_pairwise=CCMP建立文件/etc/hostapd/beekc_5g.conf
interface=wlan1
driver=nl80211
ssid=BEEKC_PI_5G
bridge=br0
hw_mode=a
channel=36
ieee80211n=1
wmm_enabled=1
ht_capab=[HT40][SHORT-GI-20][DSSS_CCK-40]
macaddr_acl=0
auth_algs=1
ignore_broadcast_ssid=0
wpa=2
wpa_key_mgmt=WPA-PSK
wpa_passphrase=passwd
rsn_pairwise=CCMP有资料说可以通过编辑配置文件/etc/default/hostapd,让hostapd同时执行两个配置文件的进程,但是我始终没有配置成功。最后我直接修改了hostapd的service文件。编辑/lib/systemd/system/hostapd.service
[Unit]
Description=Advanced IEEE 802.11 AP and IEEE 802.1X/WPA/WPA2/EAP Authenticator
After=network.target

[Service]
Type=forking
PIDFile=/run/hostapd.pid
Restart=on-failure
RestartSec=2
Environment=DAEMON_CONF=/etc/hostapd/hostapd.conf
EnvironmentFile=-/etc/default/hostapd
ExecStart=/usr/sbin/hostapd -B -P /run/hostapd.pid -B /etc/hostapd/beekc.conf /etc/hostapd/beekc_5g.conf

[Install]
WantedBy=multi-user.target
2.4 配置开机启动
使用 systemctl 工具配置 hostapd 开机自启动。将其中的 enable 替换为 start 和 status ,可以实现立即启动软件和查看软件当前状态。
$ sudo systemctl enable hostapd我在配置时出现错误信息 Failed to start hostapd.service: Unit hostapd.service is masked. 使用下面命令可以解决。
$ sudo systemctl unmask hostapd3 性能提升
完成前面的工作后就可以让树莓派作为一个热点工作了,但性能已知没有让我很满意。在树莓派上测网速为80Mbps左右,但是到了手机上就变成45Mbps左右。这章是进一步提高网速的方法。
3.1 开启BBR
BBR 是 Google 关于网路速度优化的算法,现在以及集成到了 Linux 官方的内核中了,使用 uname -r 命令,检查版本在 4.9 以上即可。使用下面命令开启 BBR。
$ sudo bash -c 'echo "net.core.default_qdisc=fq" >> /etc/sysctl.conf'
$ sudo bash -c 'echo "net.ipv4.tcp_congestion_control=bbr" >> /etc/sysctl.conf'
$ sudo sysctl -p
重启后 BBR 生效,可以使用下面命令检验 BBR 是否已经工作。
$ sysctl net.ipv4.tcp_available_congestion_control
$ lsmod | grep bbr
3.2 hostapd 配置优化
在 hostapd 配置中添加下面项
fragm_threshold=2346
rts_threshold=2347
3.3 产生随机数
使用下面命令查看当前的熵
cat /proc/sys/kernel/random/entropy_avail如果小于1000,系统就处于低熵状态。在作为路由器时会因为等待足够的熵,影响网速。这时可以安装 haveged 来增加熵。
3.4 Softnet
使用 netdata 软件监视树莓派时会提示在10min 内连接超过了 sysctl net.core.netdev_budget 或者 net.core.netdev_budget_usecs 的设定值,这会导致丢包。根据 netdata 的提示,使用 sysctl 增加 net.core.netdev_max_backlog 、 net.core.netdev_budget 和 net.core.netdev_budget_usecs 的设定值。
查看默认设定值
$ sysctl net.core.netdev_max_backlog
$ sysctl net.core.netdev_budget
$ sysctl net.core.netdev_budget_usecs
我得到的结果是
net.core.netdev_max_backlog = 1000
net.core.netdev_budget = 300
net.core.netdev_budget_usecs = 2000
分别将设定值扩大为十倍
$ sudo sysctl net.core.netdev_max_backlog=10000
$ sudo sysctl net.core.netdev_budget=3000
$ sudo sysctl net.core.netdev_budget_usecs=20000
运行一段时间后 netdata 的警告信息就会消失。这样配置在系统重新启动后就会消失,需要将配置写入 /etc/sysctl.conf
$ sudo bash -c 'echo "net.core.netdev_max_backlog=10000" >> /etc/sysctl.conf'
$ sudo bash -c 'echo "net.core.netdev_budget=3000" >> /etc/sysctl.conf'
$ sudo bash -c 'echo "net.core.netdev_budget_usecs=20000" >> /etc/sysctl.conf'